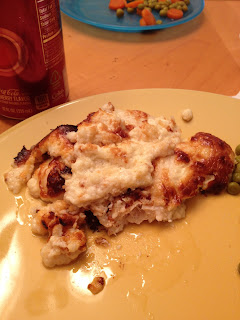
When you pin something on Pinterest, what do you do?

{Somewhat Sparkly}

{Somewhat Sparkly}
I love my life!

{Search This Blog}

{Sparkly Friends}

Monday, February 18, 2013

{Bows, Bows, and more Bows}

So, I recently went to bow class.  :) I can now make my girls bows to my little hearts content...or so I thought! Well, I kind of got addicted and knocked out 26 bows that weekend after leaving bow class...I created another 23 the next weekend and right now I sit at 63 bows created! :) Needless to say, I opened my very own Etsy store! I put my wreaths up and some of the bows as well.  I'm hoping to keep adding crafts that I have made.  Visit me at etsy.com my store is called Somewhat Sparkly! of course!  Here's a sneak peak at some of my creations :) Visit my store please! :)

http://www.etsy.com/shop/SomewhatSparkly


Tuesday, January 1, 2013

{New Year's Eve 2012}

New Year's Eve Party! :) 
We had a family friendly New Year's party this year and we had so much fun! We got an idea off of Pinterest and it was great! We started the party at 5pm and for each hour we had a helium balloon with a note inside that had an activity to do in it.  I labled the balloons with the hours (5:00, 6:00, 7:00, etc.)  I'm just sad b/c we didn't take any pics of the balloons altogether.  Below are a few of the pics of the kids taking turns popping the balloons.  Here are the different activities we did:

5pm:  Bounce house time! (We own our own princess castle bounce house, but to make it more fun we filled it with balloons...the kids loved it)
6pm:   We made bubble snakes :) It's something I found on Pinterest and the kids loved it! Very easy and a fun activity for them! :) 
7pm:  Movie & popcorn....we hooked up our older projector TV (52" I believe) on the deck in our backyard and the kids chose The Lorax to watch--they loved it!
8pm:  Chocolate fountain time! (I got a small fountain for Christmas so we hooked it up and got all the stuff out to dip in the chocolate...it was delicious!)
9pm:  We had to switch our 9 & 10 activities b/c we had so many small children and they were still up and running around at 9 so we decided to do the 10:00 activity, which was Wii tournaments on the deck (using the big TV already out there we played tennis, boxing, guitar hero, etc.)
10pm:  Like I said above, we switched 9 & 10, but we didn't actually end up doing the 9:00 activity, but the plan was to do a charcoal & logs fire in the backyard and make s'mores.  It wasn't very cold and at 10 we still had too many young ones running around so we just didn't end up doing this one.
11pm:  Toast time! :) 
12am:  Happy New Year! Kisses for everyone! (Literally & I bought a giant bag of hershey kisses for everyone!) 

Welcome sign at the door when our guests arrived! 

New Year's Resolution board...I made it out of black foam board and I just hung 2 silver sharpies with ribbon from each side.

Up close of the board :) 

Popping the 7pm balloon....movie & popcorn time! (Look at my face!)

Popping the 8pm balloon! 

eeeeeeeek!

Ahhh! It popped! 

Harvest water! It was delicious and refreshing...it's just water, ice, fresh strawberries, and lime---yum!

Resolution board again! 

It started to get filled up, but most people didn't fill it out....I think next year I will require everyone to fill it out! I'm thinking I'll save this one and put it up next to a new blank one to remind everyone what their plans for 2013 were :) 

Happy New Year!!!!!!!!!!!!!!!!!! :) 


Sunday, September 16, 2012

{Coffee Filter Wreath}

I did a craft tonight!! Yeah!! :) I made the coffee filter wreaths I've been seeing on Pinterest.  It was so easy and I'm so glad to share the process and results! Here you go....

First:  I made my own foam wreaths...my husband ran in Lowes to get them for me, but it was a total of $1.03 for the foam piping (I'll talk to him to get the technical name), but I actually cut what he bought in half and made 2 wreaths....I used packing tape to close it up.


Next, I started taking the cooffee liners and cinching them at the bottom so that they stood up.  See picture below to see what I mean....  (I bought the liners in packs of 200 for $2.19 and I only used half the pack for each wreath so I'm thrilled at how inexpensive this project was!) As I cinched them I would glue them on...(but when I did the brown one I would get like 10 ready at a time and then glue each then cinch a bunch more...I found that I made the brown one a lot faster) 


Then I just started going around the tube hot gluing the liners to it.  I had to watch that I put them close enough together so that there weren't any gaps. Also, my glue gun was a high temp only setting so it melted the foam as I went I would just have to make sure each liner was really attached.  


 Here is the finished white wreath :) 


Here is a pic of it hanging on our front door...I added the striped bow :) I love it!


I also bought natural filters that were a brown shade and here is what I made with those....I like this for fall and I think a dark brown bow or an orange one would be so cute with this :) 


Monday, September 3, 2012

{Fall is in full swing}

It's Sept. 3 today....Labor day! I'm glad to have a day off this 4th week into the school year.  So far, things are great! I have great classes and the yearbook is coming along.  I've been doing some projects, but obviously don't have as much time on my hands as I did this summer.  boo! Sat. was Auburn's first game against Clemson and sad to say, but we lost....we had great food and company though so I think that makes up for it (not for my husband or dad, but for me, Mom, and Lauren we had a great time!).  Austin smoked a boston butt and I made a slaw just from 2 types of cabbage and we used a special slaw sauce my in-laws brought us...oh! They were here for the weekend! We had a great visit and were sad to say goodbye this morning.  We had appetizers though and I'm just mad that I didn't get pictures of everything....anyways, my sister just made seasons potatoes in the oven, but a friend made jalapeno poppers wrapped in bacon, my Mom did a pimento (sp?) cheese dip with lots of dipping choices, and Austin made a homemade guacamole dip with black beans--I'm not a fan usually, but it was really good! I did the desserts and found them on Pinterest of course...I made oreo truffle brownies and s'mores dip with graham cracker sticks for dipping...Delicious! :) Anyways, we had lots of fun despite the loss. It was our first time hosting in our new house and it was great! Hope to do that much more often...until next time....

Thursday, July 26, 2012

{A Week of Pinterest Meals}


{Monday}

Melt in your mouth Chicken
Ingredients:
4 boneless chicken breast halves
1 cup mayonnaise
1/2 cup freshly grated parmesan cheese
1 1/2 teaspoons seasoning salt
1/2 teaspoon ground black pepper
1 teaspoon garlic powder

Directions:
Mix mayonnaise, cheese and seasonings.  Spread mixture over chicken breast and place in baking dish.  Bake at 375°F for 45 minutes.


{Tuesday}


Shredded Beef Tacos
Ingredients:
1 (2.5 lb) chuck roast
1 (14 oz) can beef broth
1 1/2 Tbsp chili powder
1/2 Tbsp cumin
1/2 Tbsp onion powder
1 tsp garlic powder
1 tsp salt
1/4 tsp freshly cracked black pepper
Juice of 1 lime

Serve with:
Warmed corn tortillas or warmed fresh flour tortillas*
Green or Iceburg lettuce, chopped
Monterrey Jack or Cheddar cheese, shredded
Guacamole or diced avocados
Sour cream
Fresh salsa
Cilantro
Freshly squeezed lime juice
Hot sauce

Directions:
In a small bowl whisk together chili powder, cumin, onion powder, garlic powder, salt and pepper.  Place roast in a slow cooker, pour beef broth over roast then squeeze with fresh lime juice.  Sprinkle roast with spice mixture.  Cover slow cooker with lid and cook on low heat 8-10 hours.  Remove roast from slow cooker, shred beef (remove fat) and return shredded beef to slow cooker.  Cover with lid and cook additional 30 minutes.  Remove beef from slow cooker with tongs to remove juices when plating or drain in a colander.  Serve with desired toppings.  

{Wednesday}


I call these:  "Lasagna stuffed shells" I followed the lasagna roll-up recipe below, but we had a ton of jumbo shells so I used those instead of buying lasagna noodles :) 

Lasagna Roll Ups
Ingredients:
4 Tbsp extra virgin olive oil, divided
1/2 lb lean ground beef
1/4 cup finely chopped yellow onion
1 (28 oz) can crushed tomatoes (I'd recommend Contadina Brand)
2 cloves garlic, minced
1/2 Tbsp dried basil
1/2 tsp dried oregano
Salt and freshly ground black pepper, to taste
1 (15 oz) container Ricotta Cheese
1 large egg
1/3 cup fresh flat leaf parsley (aka Italian Parsley, its about 1 small handful), chopped
2 1/4 cups freshly grated Mozzarella Cheese, divided
3/4 cup freshly, finely grated Parmesan Cheese, divided
1/3 cup freshly, finely grated Romano Cheese
1/4 tsp salt
1/4 tsp freshly ground black pepper
12 uncooked lasagna noodles


Directions:
Preheat oven to 375 degrees.  Drizzle one tablespoon olive oil into a large non-stick fry pan.  Heat over medium high heat, crumble ground beef over oil, add chopped onions and cook mixture stirring occasionally and breaking up meat, until browned.  Drain fat from beef.  Pour beef mixture into a food processor and pulse for about 5 seconds until it is ground into fine pieces.  Pour beef mixture back into fry pan and add crushed tomatoes, minced garlic, basil, oregano and 1 tablespoon olive oil and stir.  Season sauce with salt and pepper to taste then cover with a lid and simmer over low heat while preparing pasta and cheese mixture.
Cook lasagna noodles in a large pot of boiling water along with 1 tsp salt and 2 tablespoon olive oil to al dente according to directions listed on package.  Once noodles are cooked, drain and immediately line noodles in a single layer on waxed paper or cookie sheets.  
Prepare cheese mixture (I do this while pasta is cooking) by stirring together Ricotta cheese, egg, 1/4 tsp salt and 1/4 tsp pepper with a fork in a large mixing bowl until well combine.  Stir in chopped fresh parsley.  Add in 1 3/4 cups grated Mozzarella Cheese, 1/2 cup Parmesan Cheese and 1/3 cup Romano Cheese, stir mixture until well combine.
Stir meat sauce and spread 1/3 cup evenly into a 13x9 inch baking dish by tilting pan back and forth.  Spread 1/4 cup cheese mixture evenly onto each cooked lasagna noodle, then spread 1 heaping tablespoon meat sauce along the top of cheese covered noodle.  Roll noodles up jellyroll style and arrange seam side down in baking dish.  Cover rolled noodles with remaining meat sauce (about a heaping 1/8 cup over each) then sprinkle remaining 1/2 cup Mozzarella Cheese and 1/4 cup Parmesan Cheese evenly over roll ups.  Tent lasagna roll ups with foil (don't allow foil to rest on cheese or it will stick you just want to loosely tent to prevent the cheese from browning) and bake for 35 minutes in preheated oven.  Serve warm garnished with additional chopped fresh parsley. 


**Only thing I didn't have was fresh parsley...it was good without, but I'm sure it would be good with it too! :) 


Tuesday, July 17, 2012

{Upholstered Headboard for under $100}


I've been wanting to make a headboard ever since we bought a king size mattress and bed frame over a year ago now....so I finally did, yesterday! With the help of my friend, Mary, we created what I think would cost around $600 from Pottery Barn or places like PB.  I created a beautiful head baord for about $75 and I'm proud of it!  I love it and here are the steps I followed to make it....

Here is the before...I took away all the pillows so it actually looks more bare than it really is, but you get the idea...

Materials needed:  Plywood that fits the dimensions of your bed and the height you want, foam (that was the most expensive part, but I think that made the difference), batting, material of your choosing...the amount you buy of each thing depends on the size you are wanting to create...we have a king size bed so we did 2.5 yards of foam, a twin size bed of batting, and 3 yards of material...it was plenty!  *you will also need:  staple gun & staples, spray adhesive, some books, and a friend to help lift and slide!

Step 1:  using spray adhesive we attached the foam across the board (we did this step in the garage to keep from spraying that stuff in the house, but we are in FL so we had to have AC after the 5 min. it took to do the foam)

Step 2:  We went in and layed out the material first (and I ironed it with a steam setting on my iron) then we layed out the batting and we went ahead and kind of double layered the batting here). 

Note:  Before we started stapling we put some of my girls' books under the bottom just to make sure the head board was laying level and wouldn't tilt while we stapled)

Step 3:  We stapled the material around the foam and batting...we pulled it snug and it created kind of a square look around the edges.  We stapled across the top and down the sides. 

Steps 4&5:  The corners took some TLC so we took a little longer on them and made them look like a pleat somewhat (the pic kind of shows a close up of a corner)....step 5 I didn't take a picture of and I'm sorry, but we actually took some extra material I cut off in the beginnig and covered the bottom of both sides so that from either side you don't see plywood, but you see the same material...we just staped a square of it to each bottom corner of the plywood. 

Step6:  Slide the headboard into place! :) Magically the headboard fit exactly height-wise and I think it looks great! I'm so happy with it! 

Up close pic of the headboard :) I'm so excited!  

Tuesday, June 26, 2012

{Home Sweet Home}

ok, I've been trying to do things around the house and wanted to share a few finished products...we still have a long way to go, but I'm loving each part of my house more and more each day.  Here are a few pics I want to share! :) 

First off, is my little Princess Baleigh's room.  My best friend, Stephanie, made a pink and sparkly chandelier to hang in her room and I think it is just adorable! It was her birthday gift to Baleigh :) Thanks Steph!

Here is a picture of that whole side of Baleigh's room...she has the princess bed and furniture and I think the chandelier just adds the right touch of royal cuteness! :) Love it!  

Living room/family room photo collage :) **I love it and plan to keep adding to it  (Note my no sew pillow covers sitting there on the couch!) :)